8 Essential Steps to Pack Dishes and Glassware for Moving: Step-by-Step Guide
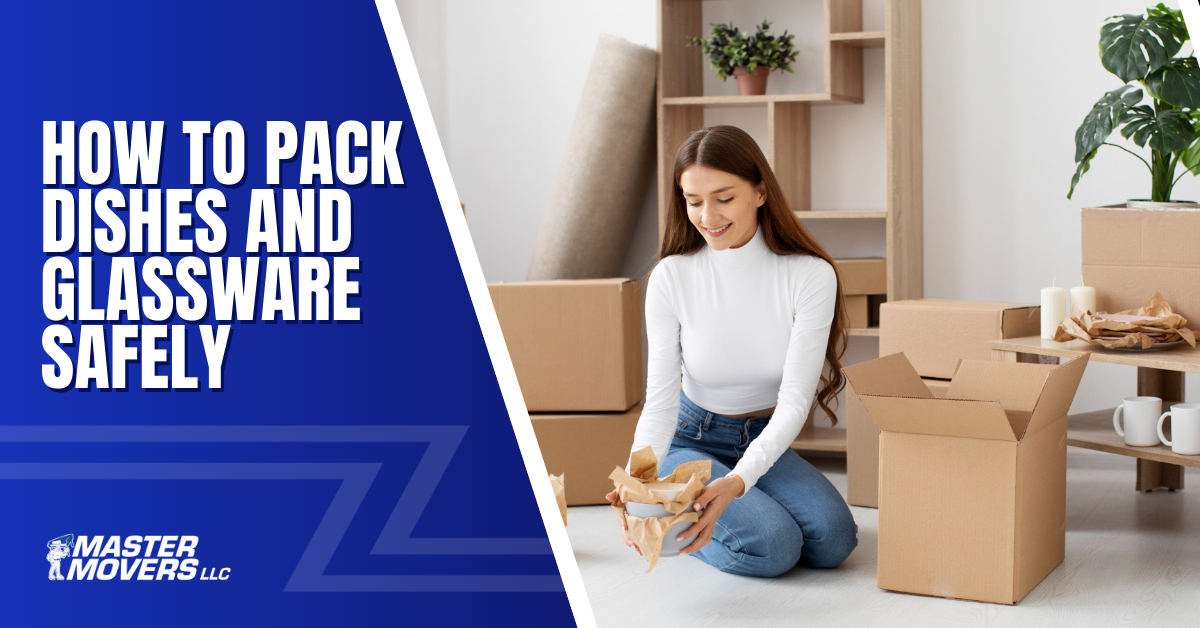
Packing dishes and glassware ranks among the most stressful parts of any move. These fragile items require careful handling, proper materials, and proven techniques to arrive at your new Nashville home intact. We've packed thousands of kitchens across Middle Tennessee, and we've seen what works and what leads to heartbreak on moving day.
This guide walks you through eight essential steps to pack dishes for moving safely and efficiently. You'll learn professional wrapping techniques, strategic box loading methods, and common mistakes that cause breakage during transit.
Gather the Right Packing Materials Before You Start
Starting with quality dish packing materials makes the difference between successful protection and shattered heirlooms. Never compromise on supplies when packing your most delicate kitchen items for a move.
You'll need small to medium cardboard boxes specifically designed for heavy items. Dish barrel boxes with double-wall construction offer the best protection for your fragile items. Stock up on unprinted packing paper, which prevents ink transfer onto your dishes. You'll need approximately 10-15 pounds of paper for an average kitchen. Bubble wrap provides extra cushioning for particularly valuable pieces like crystal stemware or heirloom china.
Pick up packing tape, preferably two to three inches wide, for proper box sealing. Nashville residents can find quality dish packing materials at The UPS Store locations throughout the city or Home Depot on Charlotte Pike.
Step 1: Sort and Declutter Your Dishes and Glassware
Sorting through your kitchen items before packing saves time, money, and space in your moving truck. Moving provides the perfect opportunity to evaluate what you actually use and what simply occupies cabinet space.
Pull everything out of your cabinets and drawers. Separate items into categories: everyday dishes, special occasion china, glassware, mugs, and serving pieces. Examine each piece for chips, cracks, or damage. Consider donating usable items you no longer need to Nashville area organizations like Goodwill Industries of Middle Tennessee or The Nashville Rescue Mission.
Set aside your most valuable pieces for special attention during packing. This decluttering process typically reduces what you're moving by 20-30 percent. This step connects naturally with creating your complete moving guide for an organized relocation.
Step 2: Prepare Your Packing Station
Creating an efficient packing station streamlines the dish packing process and prevents mistakes caused by cramped or disorganized workspaces. Professional movers always set up proper work areas before handling fragile items.
Clear a large, flat surface like a dining table or kitchen counter. Cover the surface with a clean blanket or towels to prevent scratches and provide cushioning. Arrange your supplies within easy reach. Place packing paper on one side, bubble wrap nearby, and tape and markers within arm's length.
Crumple several sheets in advance to use as cushioning material at the bottom of boxes. Set up in a room with good lighting and adequate space to move around safely.
Step 3: Wrap Individual Dishes Properly
Individual wrapping creates a protective barrier that prevents broken dishes during your move. Each piece needs its own wrapping, regardless of how carefully you think you'll transport them.
Wrapping Plates and Bowls
Start with three to four sheets of packing paper spread flat on your work surface. Place the plate in the center at a diagonal angle. Pull one corner over the plate, tucking it slightly underneath. Continue wrapping by bringing each remaining corner over the plate, creating overlapping layers.
Stack wrapped plates vertically on their edges in boxes rather than laying them flat. Vertical positioning distributes impact force along the strongest part of the plate and significantly reduces breakage risk. Heavier stoneware needs two to three sheets of paper. Fine china and porcelain require four to five sheets plus bubble wrap for adequate protection.
Wrapping Cups and Mugs
Cups and mugs present unique challenges because of their handles. Stuff the interior of each cup with crumpled packing paper to prevent crushing. Wrap the entire cup in three to four sheets, paying extra attention to the handle with additional paper layers.
Secure the wrapping with tape and place wrapped mugs upright in boxes. Coffee mugs from local Nashville favorites like Barista Parlor or Crema deserve careful wrapping that honors their sentimental value.
Step 4: Pack Glasses and Stemware Safely
Packing glasses for moving requires the most careful techniques of all kitchen items. Their thin construction and irregular shapes make them particularly vulnerable during moves.
Standard Drinking Glasses
Standard drinking glasses need individual wrapping with three to four sheets of packing paper. Stuff the interior with crumpled paper first, then wrap the exterior completely. Create a cushioning layer at the bottom of your box with three to four inches of crumpled paper.
Place wrapped glasses upright in the box, never on their sides. Pack glasses snugly enough that they won't shift, but not so tightly that they press against each other.
Wine Glasses and Champagne Flutes
Wine glasses and champagne flutes demand extra care because of their delicate stems. Wrap each wine glass individually with four to five sheets of packing paper plus bubble wrap. Start by stuffing the bowl with crumpled paper, then wrap the stem carefully.
Many Nashville wine enthusiasts with collections from local spots like Woodland Wine Merchant invest in specialized wine glass boxes. Place wrapped wine glasses stem-up in boxes and never mix them with other items. Packing glasses for moving takes patience, but proper technique prevents costly breakage.

Step 5: Layer Your Boxes Correctly
Strategic layering inside boxes creates zones of protection that prevent broken dishes during a move. Professional packers always load boxes in specific sequences based on weight and fragility.
Start every box with a three to four-inch cushioning layer of crumpled packing paper on the bottom. Place your heaviest items, like dinner plates, on the bottom layer, positioned vertically on their edges. Fill any gaps between plates with crumpled paper.
Add another layer of cushioning paper before starting the next level. Pack medium-weight items like bowls in the middle section. Reserve the top layer for your lightest items. Understanding how far in advance you book movers helps you plan adequate packing time for these careful techniques.
Step 6: Fill Empty Spaces and Secure the Box
Empty spaces inside boxes allow items to shift during transport, which causes the majority of dish breakage. Eliminating movement protects your dishes as much as proper wrapping does.
Examine your packed box carefully for any gaps. Stuff additional crumpled packing paper into any empty spaces you find. Add a final thick layer on top before closing the box.
Close the box flaps and seal them with quality packing tape. Run tape along the center seam where the flaps meet. Add perpendicular strips across the center tape for reinforcement.
Step 7: Label Boxes Clearly for Easy Unpacking
Proper labeling serves multiple critical purposes beyond just organization. Clear labels prevent rough handling and guide proper loading.
Mark every box containing dishes with "FRAGILE" in large, bold letters on all four sides and the top. Add "THIS SIDE UP" arrows on all four sides of boxes containing stemware or particularly delicate items.
Write the destination room on each box using clear, specific labels. Number your boxes and keep a master inventory list. Consider color-coding boxes by room for efficient unpacking in Nashville neighborhoods like East Nashville, Green Hills, or Germantown.
Step 8: Load Boxes Strategically in the Moving Truck
How you load dish boxes into the moving truck matters as much as how you pack them. Strategic loading positions protect your fragile items during transit.
Never place dish boxes on the floor of the moving truck. Stack boxes on top of furniture or other sturdy items that elevate them. Keep dish boxes away from the truck doors and position them in the middle sections.
Avoid stacking heavy items on top of boxes marked fragile. Load dish boxes so they remain upright throughout the journey. Plan your loading sequence so dish boxes come off the truck early at your destination.
Common Dish Packing Mistakes to Avoid
Learning from common errors helps you prevent broken dishes during a move. Many people use newspapers instead of proper packing paper, but newspaper ink transfers onto dishes and provides inadequate protection.
Wrapping multiple plates together seems efficient, but it dramatically increases breakage risk. Overfilling boxes makes them too heavy and increases bottom failure. Keep dish boxes under 30 pounds.
Lying plates flat instead of positioning them vertically results in significantly higher breakage rates. Skipping proper cushioning layers between box levels allows items to settle and contact each other during transport.
Let Master Movers Handle Your Fragile Items
Packing dishes for moving requires time, patience, and proper technique to prevent damage. These eight essential steps provide the foundation for safely transporting your kitchen items to any Nashville neighborhood.
We understand that moving fragile items safely can feel overwhelming during an already stressful move. Our professional team uses premium materials and proven techniques to ensure your dishes arrive intact at your new home. Contact Master Movers today for a free quote on professional packing or moving services throughout Nashville.